Using AWS Elastic Load Balancer and AutoScaling Group for high Scalability and Availability
In this blog post today, we will be implementing scalability and availabilty principles to this blog. We will use AWS Services, namely the AWS Elastic Load Balancer (ELB) and Auto Scaling Group to achieve our goal. This blog is powered by nginx and running on a single EC2 instance, so it is a perfect candidate for scaling and increasing its availability. Let us understand some key terms first, before we proceed:
Availability⌗
Availabilty is the ability to provide continued access to a service to its end users while remaining operational. We can achieve availability in our services by running the services in two or more locations and being isolated from each other failures.
Scalability⌗
Scalability refers to the abilty of the service to keep up with demand on its resources by adapting to the workload. This can be achieved by either scaling up vertically or horizontally. Vertical Scaling in context of servers, is the act of increasing the size of the resources like processor, memory or storage. In the same context, horizontal scaling is adding more servers and distributing workload among the servers.
Scaling ngaih.tech⌗
Since ngaih.tech is a static site running on nginx and the static site code is available on my repo we can easily replicate the running ec2 instance with very little effort and scale it.
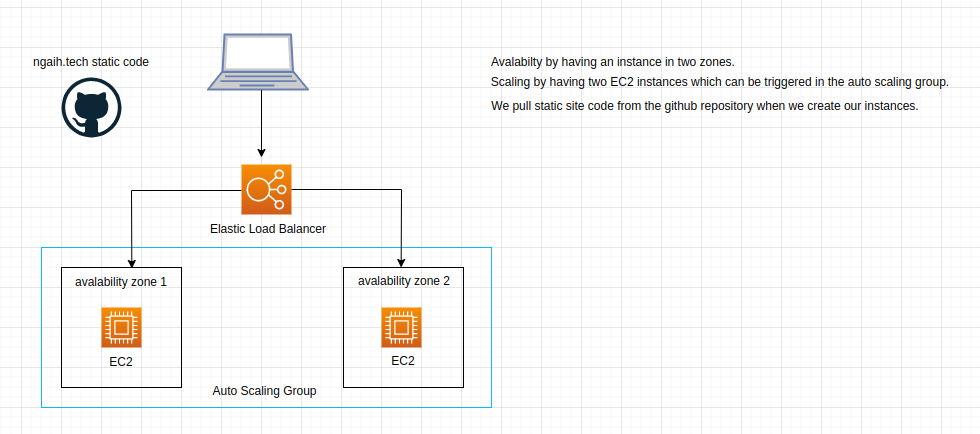
img: overview of what our infrastructure will look like.
Since we are going to create a template to launch our EC2 instances with configurations and userdata, let us first create a security group that will allow only http traffic to our EC2 instances and name it httpOnly.
We will create a template with Amazon Linux Image for our OS and use t.2 micro with default settings.
We use the following script in our userdata, which will basically clone ngaih.tech repository to our machine, install apache web server and then move our static site to the apache folder.
#!/bin/bash
yum update -y
yum install httpd git -y
systemctl enable httpd
systemctl start httpd
cd /tmp && git clone https://github.com/nga1hte/ngaih.tech.git
sudo mv ./ngaih.tech/public/* /var/www/html/
rm -r /tmp/*
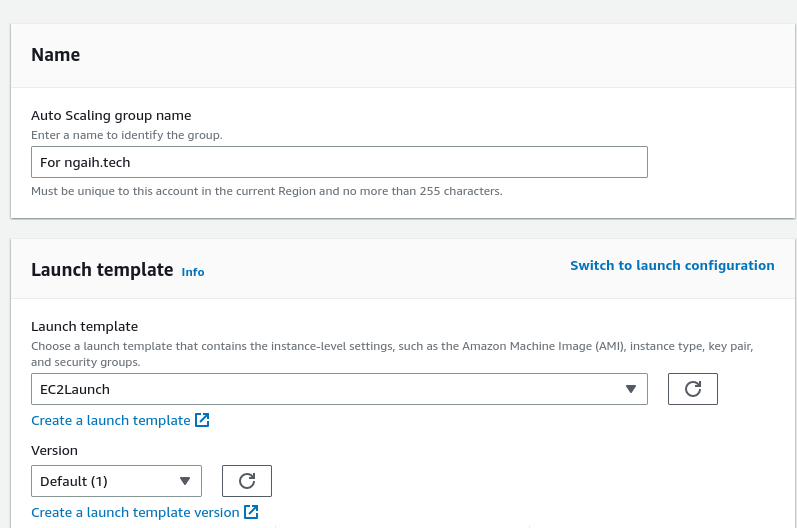
Now that our lauch template is ready, let us create an Auto Scaling Group. Auto Scaling Group enables us to automatically scale using some rules by using the launch template that we have just created.
We create the group name and select the launch template we have just created.
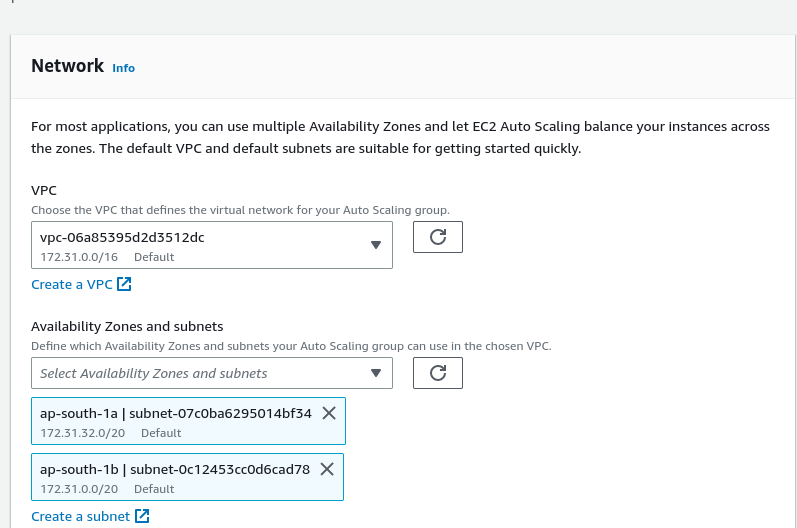
To support for availability I have selected two availability zones in my region of aws.
We will skip the next part of the setup, since we have not created a load balancer yet. We will come back later and attach a load balancer.
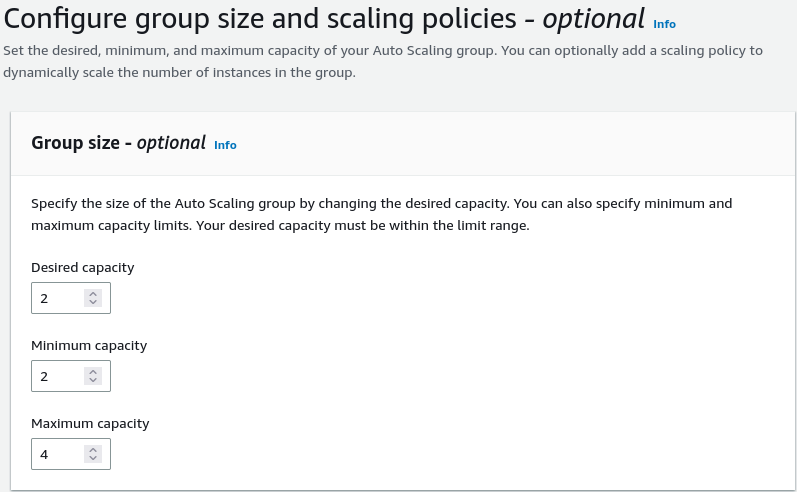
Next we enter the number of instances that will run, and the amount of instances that we can scale up to.
- Desired: The amount of instances that will run.
- Minimum: The minimum amount of instances that can run.
- Maximum: The amount of instances that we can scale to.
Our desired capacity must be between the min-max range.
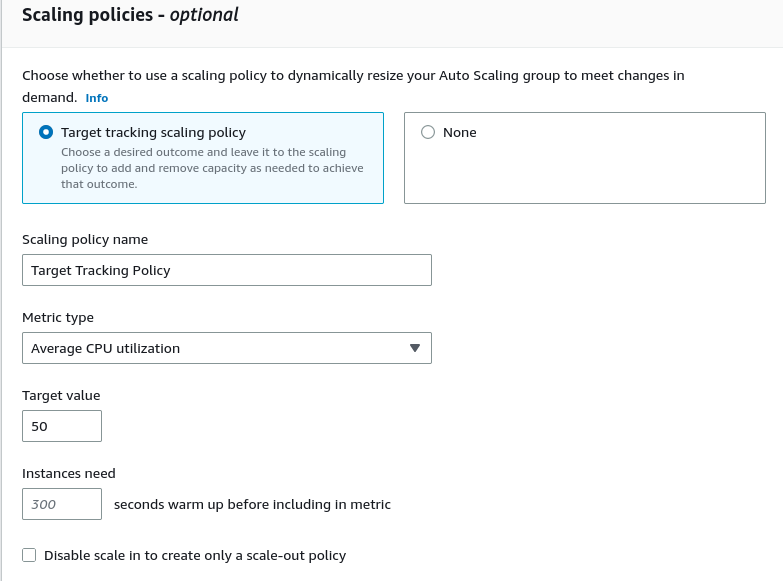
In scaling, we will use the default Target Tracking Policy and metric of Average CPU utilisaton set to 50%. This means that if the cpu use of all our instances cross 50% then we will add more instances to help with the load.
We can proceed to the next page and skip to step 7 since we are not going to use SNS and tags in this example. After reviewing, let us create the scaling group.

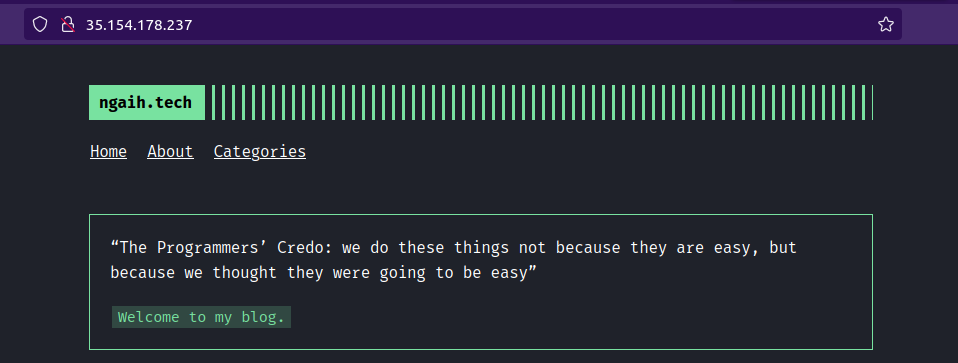
We can also observe that the autoscaling group has created two instances from the template that we have created. We can enter the public IP of the instances to verify that our userdata script works.
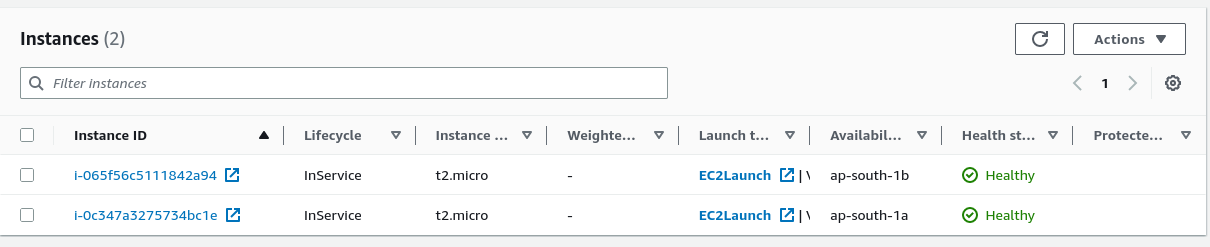
The Auto Scaling Group will make sure that we always have two instances running and depending upon the CPU usage, will create more instances when average CPU usage is greater than 50%.
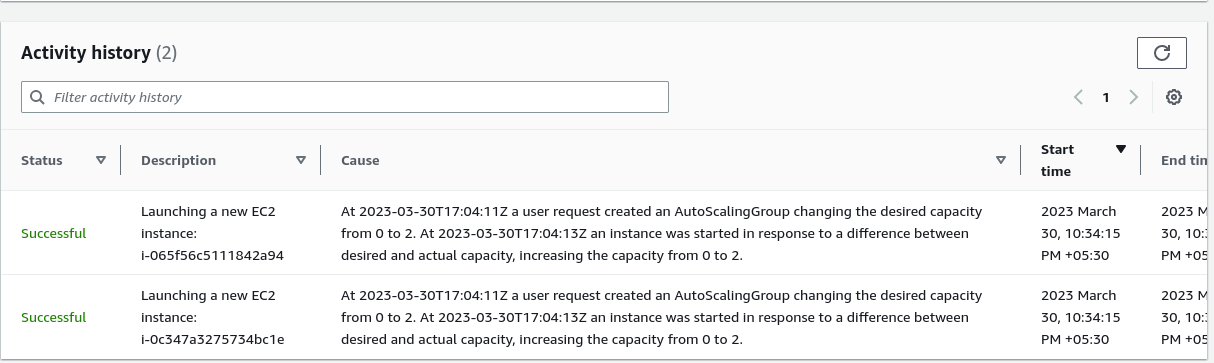
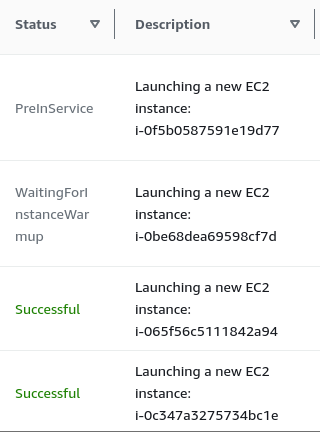
We can enter also check the activity of the auto scaling group and see the activity history. In our activity history we can see the launching of two new instances.
We can also go to monitoring and observe the various metrics, like cpu usage, network in and out etc.
Now that we have our instances ready it is now time to set up our load balancer. Go to the navigation pane and select Load Balancers and create load balancer. Since we are handling http traffic we will use the Application Load Balancer.
Create a name for the load balancer and leave the default settings, since our load balancer is going to be used on the internet traffic.
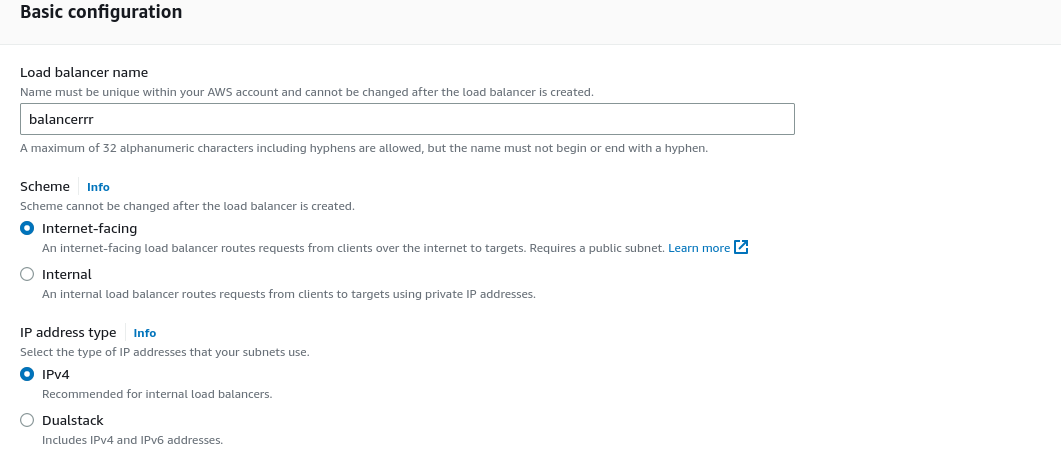
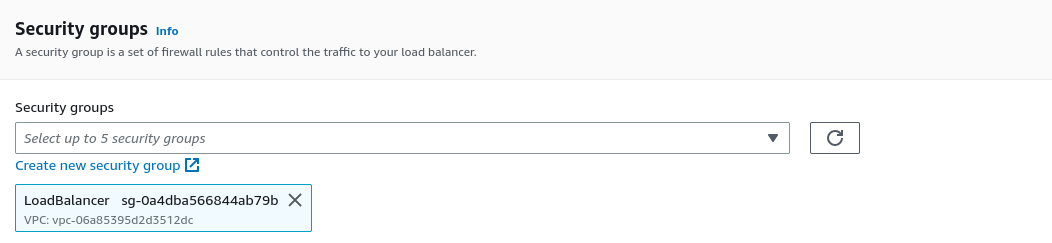
Next, we select the availability zones where our ec2 instances resides in, and make sure to create a httpOnly security group for the load balancer since we are going to expose only the website to the public.
Next we have to create listeners and routing for our load balancers.
- Listener: Protocol and Port which the load balancer will listen.
- Routing: Where the packets are going to be forwarded.
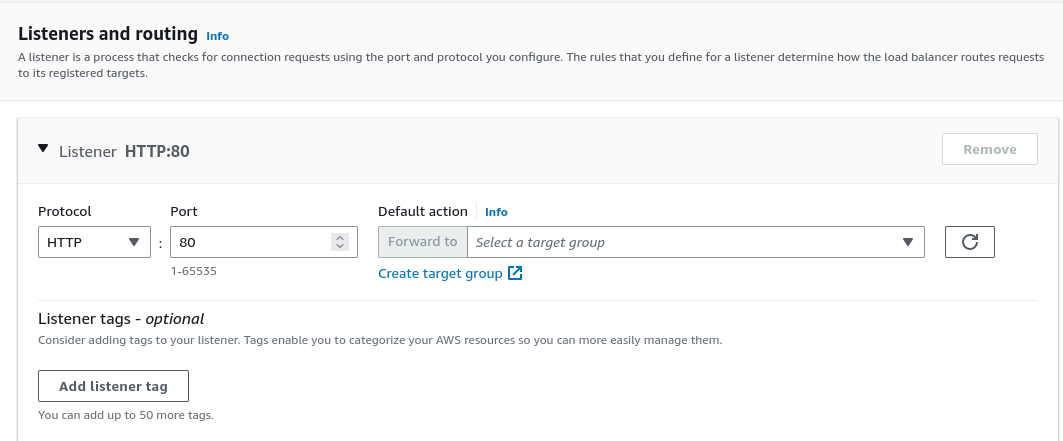
We have to create a target group. Target group is where the traffic is going to be forwarded to, and in our case, the target group must consists of the ec2 instances that we have created in the autoscaling group.
Click on the create target group to create one for our instances. On the first page, you can just input the target group name and proceed to the next page. It is also worth mentioning that the health check route is what the load balancer will use to check if the instance is down and we need to terminate the instance to spring up another instance.
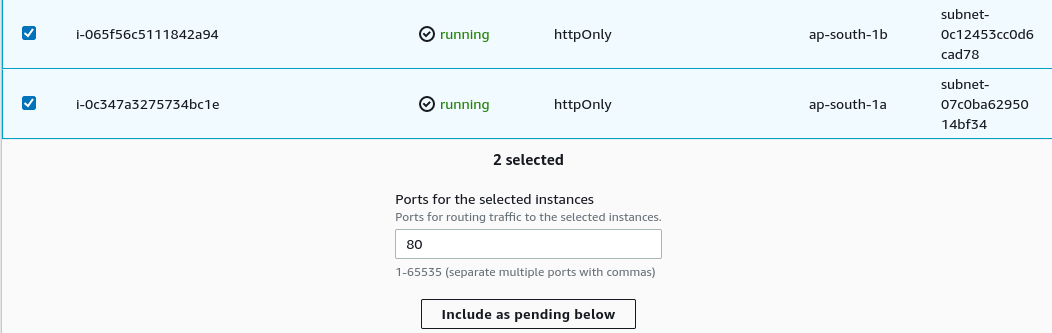
On the next page, select our instances that are running and then click on include as pending below to add our instances.
Then click on create. Now go to the previous load balancer page and select the target group we have just created.
We can now click on create load balancer. Our load balancer has now been created.
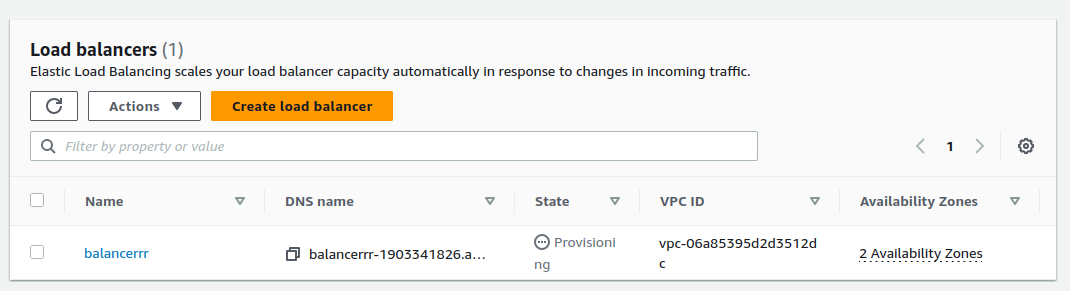
Here is the details of our load balancer.
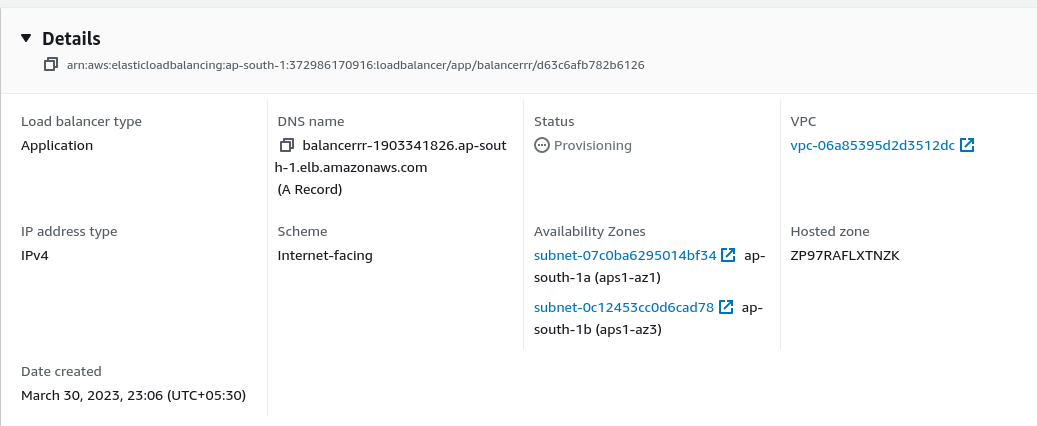
Our load balancer has a dns name and that dns name is the endpoint that is exposed to the public. Any traffic that is send to the dns name will get routed and distributed to the instances that are in our auto scaling group and depending on the utilisation of the cpu of the instances, we will scale up and down. Since the instances are in two availability zones, we have also improved the availability of our website.
DNS name: http://balancerrr-1903341826.ap-south-1.elb.amazonaws.com/
Now that we have created our load balancer, we also have to attach our autoscaling group with our load balancer so that new instances can be connected to the load balancer target group automatically.
Go to our scaling group and then go to load balancing, edit and attach the target group we have created and update.


The security group of our ec2 instances are configured in such a way that they are still exposed to the internet and anyone who have the public ip address can connect to the individual instances. So let us modify the security group of the instances to allow only http traffic from the load balancer. Make sure to make the type http and port to 80.
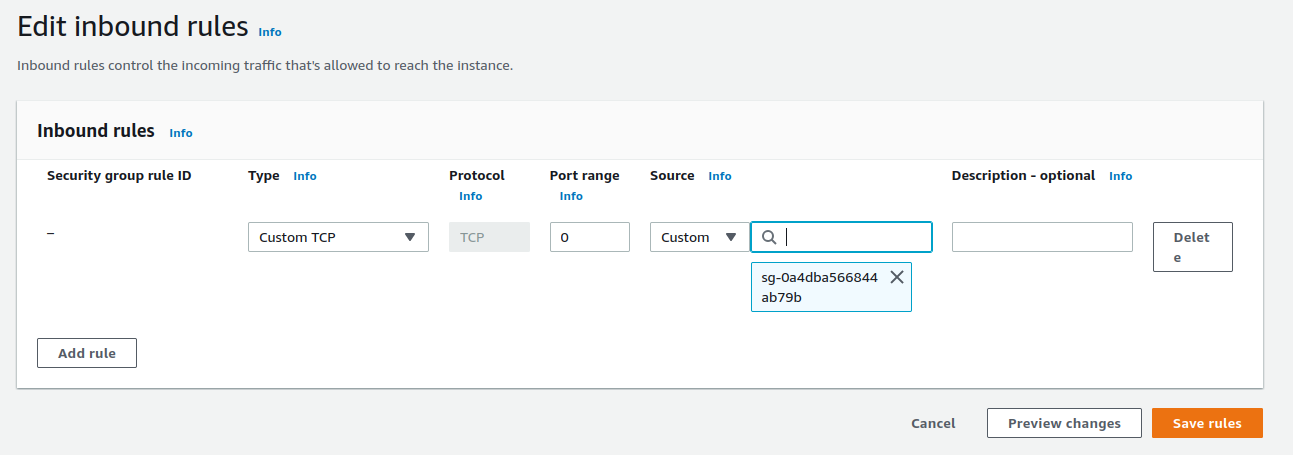
We just have to reference the security group of the load balancer in the source. Now our ec2 instances can only be accessed through the load balancer.
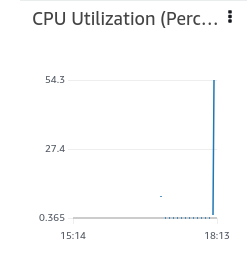
To check that our auto scaling group is working properly, I will enable ssh on our ec2 instances and perform a stress test.

Stressing both the running instances let us check the monitoring from the the auto scaling group. There is a spike in cpu utilisation above 50%
We can see two new activity in the history
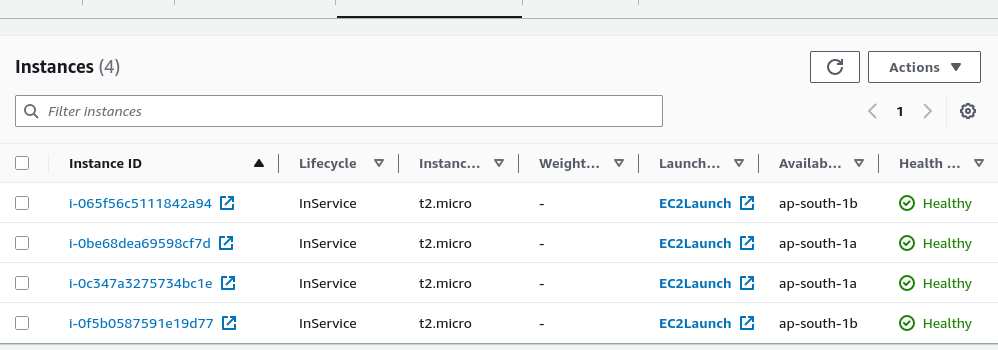
And there are now four running instances in our scaling group.
Now let me stop the stress test to see what happens when cpu usage goes down.
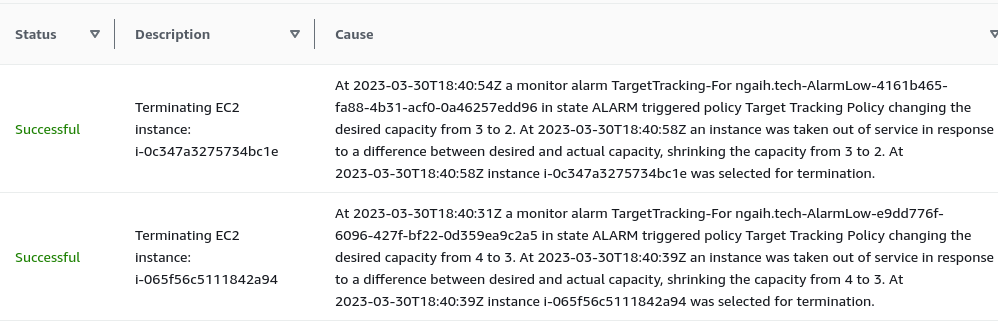
We can see that our servers scale down, to terminate the two instances since they are no longer needed.
There are other topics that we can go through like sticky sessions, other scaling polices, creating certificates for ssl for our load balancer to enable https and using our own domain for the load balancer but those are for another time.